Now that TFS 2008 SP1 is here, time to create a version of the TFS installer media that just contains the bits with SP1 applied. This is essential for installations targeting SQL Server 2008, but also makes the installation process onto Windows Server 2008 much easier and any installation faster (otherwise you have to install TFS 2008, then apply the service pack). Note that this is only required for new TFS installations - if you already have TFS installed then you are best of simply running the excellent service pack installer and it will do the business. Hopefully in a few weeks Microsoft will make a TFS 2008 with SP1 ISO image available, but in the meantime I thought I would write up the process of creating your own as I did mine.
Update: After creating the patched install of everything and running it, there were errors for the Team Build and Proxy installers. Talking with fellow MVP Etienne Tremblay this is apparently a known issue, documented as such (d'oh, I should really RTFM) and that slipstreaming of the Build and Proxy stuff is not supported at this present time. I've therefore updated this post to include the TFS SP1 rather than patched Build and Proxy installations so that you can do it the old fashioned way of installing, then patching...
Pre-requisites
- TFS 2008 Installation DVD (Workgroup, Trial or Full)
- TFS 2008 Service Pack 1
- An iso creating tool (I will use ISORecorder because it is good, free and works on Windows Vista x64).
- A couple of gigs worth of spare hard disk space to work in.
Slipstreaming the TFS Installation Files
- First, you must copy the contents of the TFS installation media onto a temporary folder on your hard drive. In my case I have created a folder called D:\tfs_sp1\source and copied the contents there.

- Extract the contents of the TFS installer executable by running the following command:
en_visual_studio_team_system_2008_team_foundation_server_service_pack_1_x86_x64wow.exe /extract:<location>_thumb.png)
- Run the following command to apply the patch to the contents of the main TFS application installation folder (AT):
msiexec /a <RTM Source Dir>\AT\vs_setup.msi /p TFS90sp1-KB949786.msp TARGETDIR=<SP1 Target Dir>\AT_thumb.png)
- Note that slipstreaming the Build and Proxy installations is not supported at this time. Also, the sharepoint extensions folder (wssExt) does not need patching so we can just copy these over.
- Because slipstreaming the Build and Proxy is not supported, you will also want to copy over the original service pack .exe file so that you can run it after installing them.
- Also, the Team Foundation Server client (Team Explorer) requires Visual Studio 2008 SP1, not the service pack for TFS. If you installed Team Explorer without the service pack onto a SP1 server then bad things can happen (I've seen class serialization errors but you might see other symptoms) - therefore you might want to exclude the TFC folder from this SP1 disc so that you have to install it from a Visual Studio Team Suite disc instead - hopefully remembering to run Visual Studio SP1 afterwards. However if, like me, you frequently install Team Explorer onto your TFS servers so that you can manage them directly from the server then you might want to also include the offline installation for Visual Studio on your new ISO image, that way you can quickly get access to the service pack. To get hold of the offline installer, download the Visual Studio 2008 SP1 iso image, mount the image and then copy the vs90sp1 folder.
- While you are at it, you might as well download the latest copy of the TFS Install Guide. If you are really fancy you can copy all the files over from the root of the RTM source and edit the setup.ini file to point to the new version of the document (mine is TFSInstall-RTM-v080811.chm).
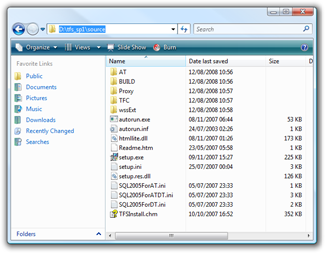
- Now we have a nice little package that contains all the bits we need to install TFS SP1 onto a server. Mine looks like this:
_thumb.png)
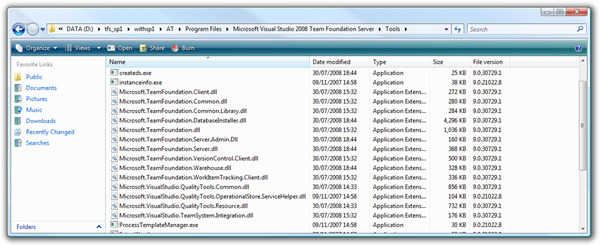
If we go look inside the AT folder and check the file versions, we can see which assemblies were patched. The TFS2008 RTM versions of the assemblies were 9.0.21022.8 but the TS 2008 SP1 versions are 9.0.30729.1
- You could just burn the contents of your SP1 folder to a DVD, but I personally like to have it as an ISO image so that I can easily archive it and point to it from a Virtual PC. To create an ISO image using the excellent ISORecorder is very easy - just right click on your SP1 folder and select "Create ISO Image".
_thumb.png)
And there you have it. A handy ISO image that should speed up your TFS installations no end. Happy installing!

You mention the TFS Install Guide, but the link only contains pre-SP1 and SP1Beta install guides. Where can I find a SP1-RTM install guide?
Dave,
The version called "TFSInstall-RTM-v080811.chm" contains the latest SP1 information. The owners of this document have been informed and hopefully they will update the name of it soon to make it less confusing.
Martin.